Thursday, June 4, 2015

DIY: Summer wreath

This was so much fun to make. I couldn't find an N so I made one. I used really good quality cardboard. You can add whatever you want to it, these instructions are for the one pictured. Have fun and enjoy.

What you'll need:

  • Burlap 
  • glue gun
  • flowers
  • Giant letter (of your choosing. I chose N cause my last name is Nielsen)
  • branch wreath 
For the letter:

  • Cardboard
  • exacto knife (I dont know how to spell it sorry)
  • paint of your choosing color
  • paint brush 
  • ruler
Here's how I did the letter:
First I measured how big I wanted it on the cardboard. Than I cut it with the exacto knife. I used a metal ruler which helped a lot in cutting the letter. Once its cut I just painted it, I put about 3-4 layers of paint on it and let it dry. It might bend, that's fine it should go back to normal once dry.

What to do:
Place letter on wreath first. Do not glue anything yet, assemble all the decor on it first before you glue. Than assemble flowers around it. Its much easier this way. Next, make a bow out of the burlap; this took me quite sometime as burlap is hard to work with. Place the bow on wreath. Fix any flower or the letter to make it look the way you want it. Lastly, glue everything on the wreath. I had to put the glue gun in the wreath to glue the flowers on it.
Now go hang it up and enjoy.

Sorry if the instructions don't make any sense, if you have questions I'll be happy to answer them.


See you for the Autumn wreath!!!

Friday, May 15, 2015

Detox drink recipies

I have had a lot of people ask me how I am making my detox drinks.
Each drink does different things and some people like different flavors. These drinks are technically flavored water.
Ever since I started drinking these I have been feeling great and loosing weight. I can feel it cleansing my system
I have been using fresh ingredients, like the mint I get from my garden. These will usually last me about 2 days. You can either let them sit overnight or start drinking it as soon as you mix it.


Strawberry mint:

  • 3-4 Strawberries, sliced (the more strawberries the more flavor) 
  • Handful of fresh mint 
  • 1 slice of lemon (optional very delicious)
Put all in your favorite water bottle and shake it real good. 

Apple cinnamon:
  • 6 slices of apples (the juicier the better)
  • 2-3 sticks of cinnamon (add less for less cinnamon taste)
Put all in water bottle and shake

Cucumber fresh:
  • 6-7 slices of cucumber
  • 2 slices of lemon
  • 2 slices of lime
  • handful of mint (optional)
Put in bottle and shake.

The works:
  • 3 strawberries
  • 2 slices cucumber
  • 1 slice of lemon
  • handful of fresh mint
Put in bottle and shake. 

Green tea shot:
  • 1 green tea packet or barley tea (mugichiya) - steep in hot water than add to cold water.
  • 2 slices of lemon
  • handful of fresh mint
Add in ice water and shake. 

Lemon berry:
  • 6 raspberries
  • 5 blackberries
  • 5 blueberries
  • 2-3 lemon slices
Put in bottle and shake.

Delicious Orange:

  • 2-3 slices of oranges
  • handful of mint
  • 1 slice of lemon
  • 2 strawberries


Watermelon mint:

  • Handful of sliced watermelon
  • handful of mint
  • 1 slice of lemon
  • 1 slice of lemon


You can mix and match anything you want. These are just the most popular recipes.
All of these are amazing and taste delicious. 

 I do not take credit for the pictures.


Monday, April 27, 2015

DIY: Spring wreath

Wow this took me forever to plan. I finally got it though.

What you'll need:

  • branch wreath
  • flowers
  • butterflies or birds
  • hot glue gun
  • burlap
  • twine


What to do:

First lets make the banner. Draw a triangle on the burlap and cut it out. I just guessed on this part. Trace the first triangle you made on the burlap and cut those out. I drew spring on them with just permanent marker and it turned out fine. Next, on the back of the triangles put hot glue on the top and lay the twine on it to glue it on. Continue with the others. I put them close together cause it didnt fit on the wreath.


Now lets do the flowers. What I did was arrange the flowers on the branch wreath like I did in the picture. I added butterflies with the flowers to add more spring to it.
 I kept adding flowers to make it even and to make sure there wasnt to much goin on. After I arranged the flowers I took my glue gun and started gluing the flowers. I just stuck the glue gun in the wreath and glued the stems to the branches. It took a whole stick of glue to do this so be patient.
After I glued it I tugged on each flower to make sure they were secure on the wreath.

When you finish the flowers add your birds or butterflies. Than add the banner however you want. I just hot glued it to the wreath.
Finished product. This was so much fun.
See you in the fall for the fall wreath. 

Sunday, April 26, 2015

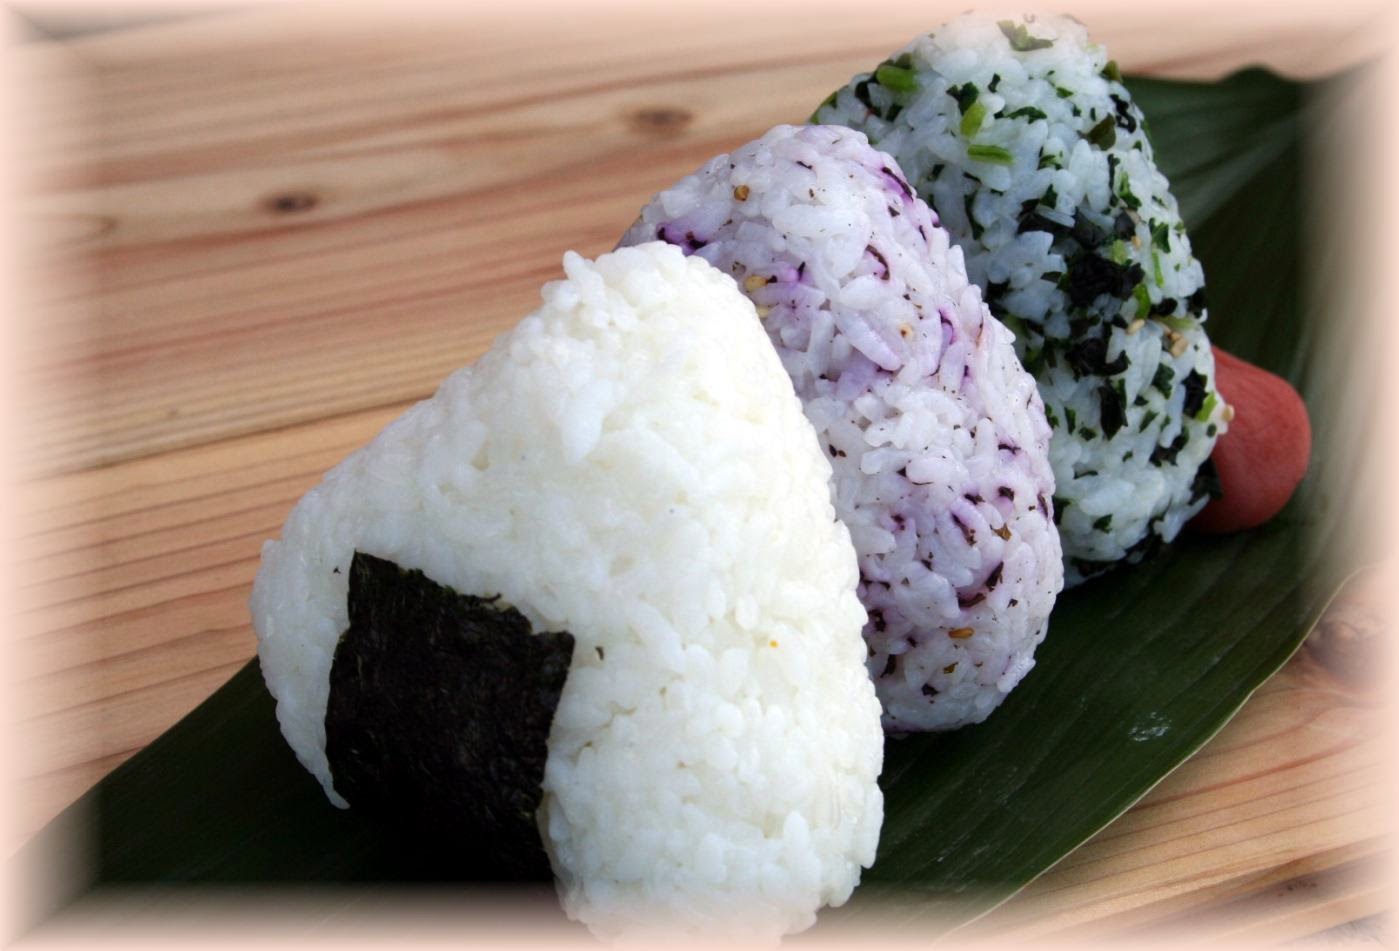
Onigiri おにぎり

This is a traditional Japanese dish. Its called Japanese rice ball or Onigiri (おにぎり).
I made these a lot in my Japanese class and with my dad. They are so fun to make and you can stuff them with anything. For this recipe I stuffed it with teriyaki chicken and kewpie きゆぴ.
If you want something different you can add tuna, imitation, crab, avocado, ect...  
This is some mixed with furikake.
Also to add more flavor you can add Furikake ふりかけ (rice seasoning) in with the rice. They have all different flavors and its so delicious.
In Japan they do little cute drawings
with onigiri.
Also for the chicken I just cook chicken and add
 tonkatsuとんかつ sauce.
The pictures are made from experts. My version might be different than how other people do it.

What you'll need:

  • water ( to moist your hands so the rice wont stick to you)
  • sticky rice
  • seaweed (optional)
  • Filling (chicken, beef...)
  • Kewpie (Optional)
What to do:
First off cook your rice. Than put all of it in a seperate bowl and add furikake if desired. Use a rice spoon or a regular spoon and stir to cool it off and mix the furikake ふりかけ. When the rice has cooled soak your hands in water. Grab a handful of rice, form a ball and poke a hole in it forming a crater. Add the filling of your choice. Add a little more rice on top of that and work it in. You can form a ball or triangle as pictured. 


Now you can enjoy your homemade Japanese rice balls.
Mine don't look very good cause I didn't use sticky rice. They did taste really good though.


this is my version of a onigiri cartoon I drew
 いただきます
(lets eat)

.

.